Drawing Basics

Learn to Draw - WHY?
Before I tell you about the basics of learning to draw, I think you should know why so many people want to draw.
The simple answer for me is the ability to create something from nothing.
There is a sort of magic in that. Many people learn to draw for various reasons; to relieve stress, fill up long hours, escape problems or simply acquire mastery over something.
.
Basic Tools of Drawing
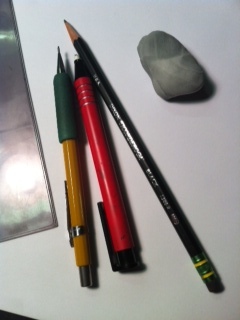
The great thing about drawing is that you only need a few things that are easily acquired. Here's the basic list:
- No.2 Pencil or mechanical pencil
- kneaded eraser
- straight edge or ruler
- pen-style eraser or eraser stick
With these few items, you can create whole new worlds, build structures or bring forth fantasy creatures from the deepest reaches of your imagination.
Let's take a closer look at the specific uses of each tool...
.
Pencil and Straight Edge
The pencil and some sort of straight edge (or ruler) are all you need to create a set of plans needed to construct a simple deck to putting together a series of complex buildings.
It never ceases to amaze me that such grand things can be created using these two basic tools of drawing.
I typically use a softer lead No.2 pencil when I want to get some real variance in the line quality of a drawing. For example, I can make very thin lines or very broad lines with the same pencil. The drawback is continual sharpening.
When I want a steady line of the same width, I use a mechanical pencil. The advantage here is having a consistent point and no need for sharpening.
For a straight edge you could use a ruler, a drafting angle (shown in first picture) or in a pinch, you can even fold a piece of basic paper and use the folded edge to make straight lines.
.
Two Types of Erasers
When you learn about the basics of drawing, you should know about erasers.
There are some artists who never use an eraser. Some artists I have known would tell me it was not right to use an eraser of any sort, something about not being "real" art.
We have a name for that in Texas - Hogwash.
Kneaded Eraser

Eraser Stick or Pen Eraser
Erasers are an essential tool when drawing.
There are many types of eraser but I only use two types when I draw.
Kneaded Eraser
The Kneaded eraser is made of a material that is intended to pick up pencil lead marks and absorb them into the eraser. You actually knead this eraser like bread dough to clean it.
Another advantage of the kneaded eraser is shape. Using your fingers, you can make a thin, sharp edge for detailed erasing or you can use the large mass to remove large areas of pencil marks.
I actually like using the kneaded eraser because it helps keep my hands and fingers strong. Once you get one, you'll understand what I mean - it's a real workout for your hands.
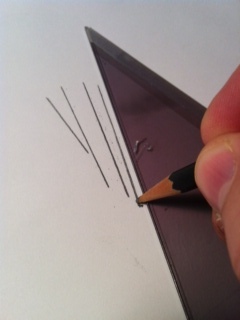
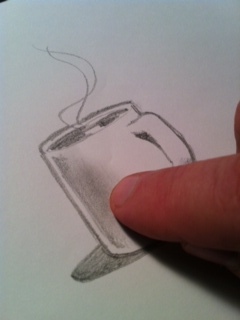
Eraser Stick
Ever since I discovered these many years ago from a draftsman friend of mine, I have used them extensively.
These amazing drawing tools allow me to remove very small areas from a drawing (see photo).
Other types of erasers designed for specific purposes include latex, electric and vinyl. For basic drawing, the kneaded and eraser stick should be all you need.
.
Shading
Another basic skill necessary for drawing is the ability to add shading.
Shading is important and, when done right, will lend a real sense of dimension to your drawings.
There are several methods used to create shading in your drawing:
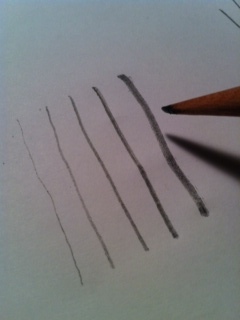
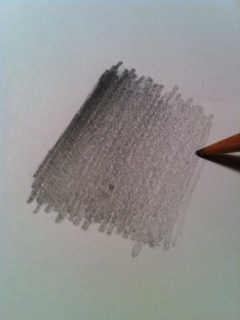
Pencil Shading
This is simply done by moving the pencil back and forth across a certain area. Darker shading is accomplished by pressing down firmly on the pencil, lighter shading uses less pressure.
This type of shading is the most versatile and controlled. It does take a bit of practice to learn how to shade well with a pencil, but a little practice will yield great shading results.
Using Your Finger
This type of shading is used after you shade an area of your drawing using the aforementioned method.
Rubbing your finger on the paper surface will blend and smear the pencil marks creating a very smooth look.
Using your finger takes quite a bit of practice to get it just right, however, the results can be spectacular.
.
Learning Basic Shapes
One of the most essential aspects of basic drawing is teaching yourself to see everything you draw as a collection of basic shapes.
In the examples to the right, you can see the basic shapes in the drawings there.
.
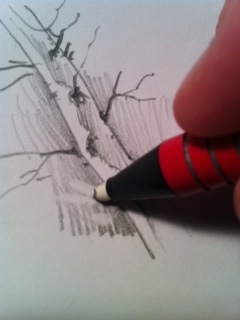
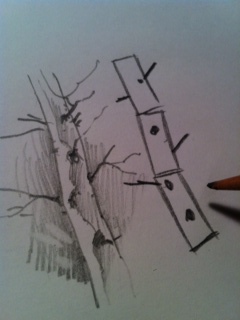
Shapes in an Aspen Tree
For example, the Aspen tree in the first photo is simply a series of rectangles aligned in slightly offset angles from one another.
.
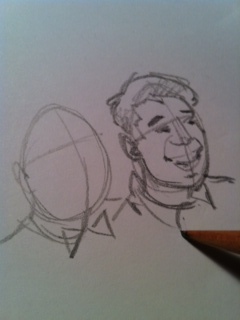
Shapes in a Human Head
In the next drawing of the human head, you can see a number of shapes there.
The basic shape of the head is an oval with a horizontal and a vertical line to indicate the position of the eyes, ears, nose, mouth, etc.
The features on the head are also made up of basic shapes. The nose is made up of various triangles, the eyes are circles and the mouth is a semi-circle.
.
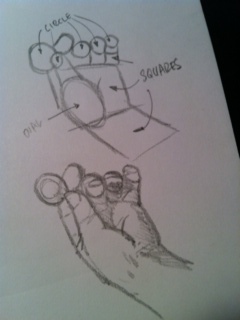
Shapes in the Hand
One of the most difficult things for me to learn to draw was the human hand. It is made up of a lot of different shapes.
But the key to drawing a hand well is seeing those shapes and how they fit together. In the drawing, I have identified the various shapes used to make up a hand.
The ability to see basic shapes is one of the most difficult and essential skills necessary for drawing well.
Seeing the basic shapes in things will take some practice. Once you get the hang of it, your drawings will become exponentially better.
.
Its perfectly normal to get frustrated and draw something many times until you get it right. The fun of drawing is in the journey as well as the end result!
Guess what? - the more you practice, the easier drawing becomes.
I wish you the best with your drawing!
.
________________________________________________________________


